
The active recovery period, when you experience swelling, discomfort, and dietary restrictions, typically lasts 7 to 14 days. However, the complete biological healing process, called osseointegration, takes 3 to 6 months. During osseointegration, the titanium implant fuses with your jawbone at a cellular level, creating a stable foundation for your crown, bridge, or denture. Most patients return to work within 1 to 3 days and resume normal eating within 2 to 3 weeks.
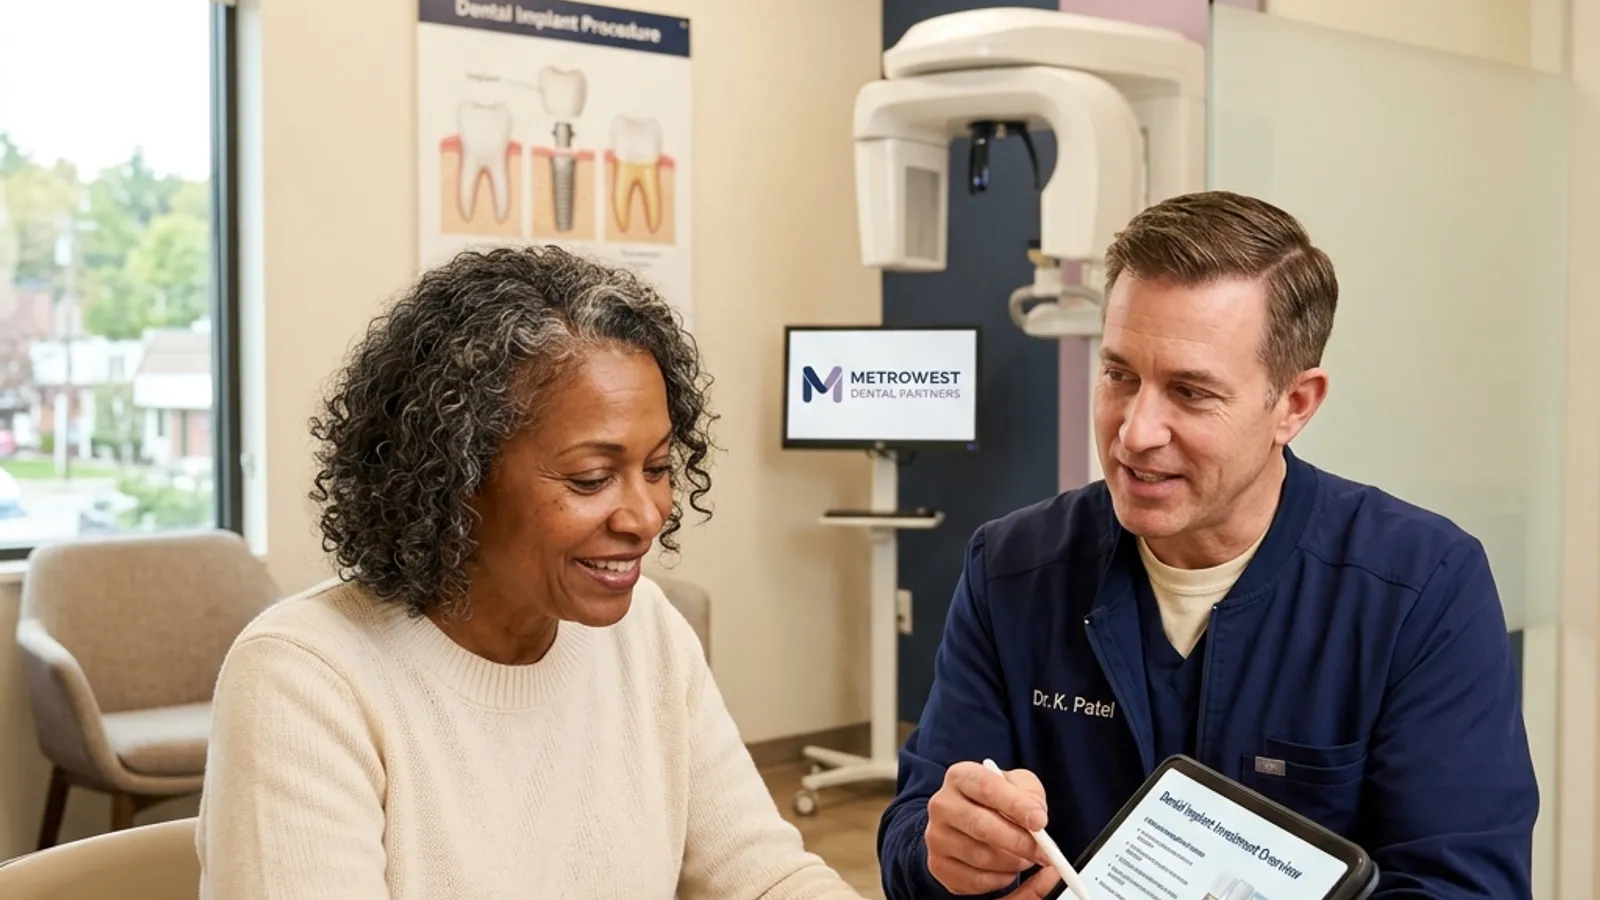
If you are planning to have a dental implant placed at Innova Smiles in Marlborough, one of the first questions you are likely to ask is: "What is the recovery really like?" This is an important question, and you deserve an honest, detailed answer, not a vague reassurance that "it is easier than you think." The truth is that recovery is manageable for the vast majority of patients, but it follows a predictable timeline with distinct phases, each with its own expectations and guidelines.
Dr. Ambereen Fatima provides every implant patient with a detailed post-surgical care protocol. This guide expands on that protocol with a week-by-week walkthrough of what to expect, how to manage each phase, and what to watch for.
Recovery begins before the procedure. How well you prepare directly impacts how smoothly you heal.
- Stock your kitchen with soft foods: yogurt, applesauce, mashed potatoes, scrambled eggs, protein shakes, smoothie ingredients (no straws), broth-based soups, oatmeal, and ripe bananas.
- Fill prescriptions in advance. Dr. Fatima typically prescribes an antibiotic (to prevent infection), an anti-inflammatory pain reliever, and an antimicrobial mouth rinse. Having these ready means you can go straight home after surgery.
- Arrange your schedule. Plan to take the day of surgery and at least the following day off from work. If your job involves physical labor, plan for 3-5 days off.
- Arrange a ride. If is used, you will not be able to drive yourself home. Have a friend or family member ready to pick you up.
- Prepare your recovery area. Extra pillows to keep your head improved, ice packs, clean gauze, and a water bottle within reach.
The implant procedure itself typically takes 45 to 90 minutes per implant under local anesthesia (with optional). Dr. Fatima uses 3D CBCT-guided surgical protocols to place the implant with sub-millimeter precision, minimizing tissue disruption and optimizing the implant's position relative to your bone, nerves, and adjacent teeth. Learn more about guided implant surgery.
- Numbness. Local anesthesia wears off in 2-4 hours. Begin taking your prescribed pain medication before the numbness fades, this prevents pain from escalating.
- Gauze pressure. Bite on gauze pads placed over the surgical site for 30-45 minutes to control initial bleeding. Change gauze every 30 minutes until bleeding slows to light oozing.
- Ice packs. Apply an ice pack to the outside of your cheek — 20 minutes on, 20 minutes off, for the rest of the day. This is the single most effective measure for controlling swelling.
- Head elevation. Keep your head improved above your heart, even while sleeping. Use two or three pillows. This reduces blood pressure to the surgical area and minimizes swelling.
- No rinsing, spitting, or using straws. These actions create suction that can dislodge the blood clot forming over the implant site, a condition called dry socket that significantly delays healing.
- Diet. Cool liquids and very soft foods only. Avoid anything hot (temperature-wise), as heat dilates blood vessels and increases bleeding.
This is the period when swelling and discomfort peak and then begin to subside.
- Swelling reaches its maximum between 48 and 72 hours post-surgery. This is normal and not a sign of infection. Swelling may be visible on the cheek and may cause mild asymmetry.
- Discomfort is most noticeable on days 1 and 2. Most patients describe it as a deep, dull ache, similar to a bruise rather than a sharp pain. The intensity is typically well-controlled with the prescribed medication.
- Minor bleeding or oozing from the surgical site is normal for the first 24-48 hours. Your saliva may appear pink-tinged. If bleeding is steady or heavy, apply firm gauze pressure for 30 minutes and call our office.
- Bruising may appear on the cheek or jawline, especially in older patients or those taking blood thinners. Bruising is cosmetic and resolves on its own within 7-10 days.
Dr. Fatima's standard pain management approach prioritizes anti-inflammatory medication:
- Ibuprofen (600 mg every 6 hours), this is the foundation of post-implant pain management because it addresses both pain and inflammation. A 2017 study in the Journal of Oral and Maxillofacial Surgery found that ibuprofen alone was sufficient for pain control in 85% of single-implant patients.
- Acetaminophen (500 mg every 6 hours), can be alternated with ibuprofen for enhanced relief. The combination of ibuprofen and acetaminophen has been shown to be as effective as stronger prescription pain medications for dental surgical pain.
- Prescription pain medication, reserved for patients who need additional relief beyond the ibuprofen/acetaminophen protocol. Most patients do not need prescription pain medication beyond day 2.
Important: Do not take aspirin for pain relief after implant surgery. Aspirin inhibits platelet function and can increase bleeding.
- Ideal foods: Smoothies (without straws), yogurt, applesauce, mashed potatoes, scrambled eggs, lukewarm broth, protein shakes, pudding, Jell-O, mashed avocado
- Avoid: Crunchy foods, spicy foods, acidic foods (citrus, tomato sauce), hot beverages, carbonated drinks, alcohol
- Chew on the opposite side of your mouth from the implant site
- Stay hydrated, adequate water intake supports healing. Aim for at least 64 ounces per day.
- Do not brush the surgical area for the first 3 days. Brush the rest of your teeth gently with a soft-bristled toothbrush.
- Begin gentle salt water rinses on day 2. Dissolve half a teaspoon of salt in 8 ounces of warm water and let the solution flow passively over the surgical site, do not swish vigorously. Rinse 4-5 times per day, especially after eating.
- Use the prescribed antimicrobial rinse (typically chlorhexidine) as directed, usually twice daily.
- Swelling begins to resolve noticeably by days 4-5. Most patients report feeling significantly better by day 5.
- Discomfort transitions from constant to intermittent. Many patients discontinue prescription medication and switch to over-the-counter ibuprofen alone.
- The surgical site starts to look better. Gum tissue that was swollen and red begins to return to a healthier pink color.
- Energy returns. Most patients feel ready to return to normal activities, including desk-based work, by day 3-5. Physical labor or strenuous exercise should still be avoided.
You can begin to expand your diet:
- Add: Soft pasta, cooked vegetables, fish, tender chicken (cut into small pieces), soft bread, bananas, cooked rice
- Still avoid: Hard, crunchy, or chewy foods (nuts, chips, raw carrots, steak, crusty bread, bagels). These foods can traumatize the healing tissue or place excessive force on the implant before integration.
- Gently begin brushing near the surgical area using an ultra-soft toothbrush. Be careful not to directly scrub the implant site or disturb any sutures.
- Continue salt water rinses after meals.
- Continue chlorhexidine rinse if prescribed.
Dr. Fatima typically schedules a follow-up appointment at 7-10 days post-surgery. During this visit:
- Sutures are removed (if non-resorbable sutures were used)
- The surgical site is examined for proper healing
- A periapical X-ray may be taken to confirm implant position
- Your home care routine is reviewed and adjusted if needed
- Swelling is fully resolved for most patients by the end of week two.
- Discomfort is minimal to absent. Most patients no longer need any pain medication.
- The gum tissue is healing over the implant. Depending on whether a healing abutment was placed at the time of surgery (one-stage approach) or the implant was covered by gum tissue (two-stage approach), you may see a small metal cap emerging through the gum or a smooth gum surface over the implant.
- You feel normal. Patients routinely tell us that by week three, they forget the implant is even there.
- Gradually return to your normal diet. Most foods are fine by week three.
- Continue to be cautious with very hard foods directly over the implant site (hard candy, ice, raw nuts, popcorn kernels). The implant is not yet integrated with the bone, and excessive force could compromise healing.
- Resume normal exercise by week two, starting with moderate intensity and building back to full activity.
- Avoid contact sports without a mouthguard for at least six weeks.
This is the quiet phase of healing, the most important biological process is happening entirely below the surface.
Osseointegration is the process by which your living bone cells grow onto and around the surface of the titanium implant, creating a direct structural and functional connection. This is what makes dental implants fundamentally different from bridges or dentures: the implant becomes part of your body.
The titanium surface of modern implants is microscopically textured (often sandblasted and acid-etched) to maximize bone cell attachment. A 2020 review in Biomaterials described the process in three stages:
- Initial stability (weeks 0-4): The implant is held in place by mechanical friction between the implant threads and the bone. This is called primary stability.
- Biological integration (weeks 4-12): New bone cells (osteoblasts) begin to form directly on the implant surface. During this transition, there is a temporary dip in stability as mechanical friction is replaced by biological bone growth.
- Mature integration (months 3-6): The new bone matures and mineralizes. The implant is now solidly integrated.
Honestly? Very little. During months two and three, there is no pain, no swelling, and no dietary restrictions beyond common sense. You live your normal life while your body does the biological work of integrating the implant.
While complications during osseointegration are uncommon (overall implant success rates exceed 95% according to the American Academy of Implant Dentistry), you should contact our office if you experience:
- New onset of pain at the implant site, especially pain that worsens over time rather than improving
- Looseness or mobility of the implant or healing abutment
- Swelling or pus around the implant site
- A persistent bad taste in the area of the implant
These could indicate early implant failure or peri-implant infection, both of which are treatable if caught early.
Dr. Fatima monitors osseointegration with periodic clinical examinations and radiographs. A typical follow-up schedule includes appointments at:
- 1 week (suture removal)
- 4 weeks (early healing check)
- 8-12 weeks (mid-integration assessment)
- 12-16 weeks (integration verification before proceeding to the restorative phase)
Before moving to the restorative phase (placing the final crown, bridge, or denture), Dr. Fatima verifies that the implant is fully integrated through:
- Clinical testing. The implant is tested for stability using percussion and torque testing. A well-integrated implant sounds solid (a sharp "clink") and resists rotational forces.
- Radiographic evaluation. X-rays confirm that bone has grown around the implant without any radiolucent (dark) zones that would indicate a gap between bone and implant.
Once integration is confirmed, the restorative phase begins:
- Impression or digital scan. Dr. Fatima takes a precise impression of the implant position and surrounding teeth using a 3Shape digital scanner. This data is sent to the dental laboratory.
- Abutment placement. A custom abutment (the connector piece between the implant and the crown) is attached to the implant.
- Crown fabrication. The dental laboratory fabricates your custom crown to match the color, shape, and contour of your natural teeth. This takes approximately 2-3 weeks.
- Crown delivery. The final crown is placed, adjusted for comfortable bite contact, and securely attached.
The restorative phase typically requires 2-3 appointments over 3-4 weeks. When the final crown is placed, the process is complete, you have a fully functional replacement tooth that looks, feels, and functions like a natural tooth.
Your implant does not need special maintenance, but it does need consistent care:
- Brush twice daily including around the implant crown
- Floss daily, use floss threaders or a water flosser around the implant
- Professional cleanings every 6 months (or more frequently if recommended)
- Wear a nightguard if you grind or clench your teeth. Excessive bite forces are one of the few threats to a well-integrated implant. Read more in our post about teeth grinding and night guards.
- Annual radiographs to monitor bone levels around the implant
With proper care, dental implants have documented survival rates exceeding 95% at 10 years and over 90% at 20 years, according to long-term follow-up studies published in Clinical Oral Implants Research.
Not every recovery follows the exact same timeline. Factors that may extend or modify your recovery include:
- Bone grafting. If a bone graft was performed simultaneously with implant placement (or before it), healing time increases. Grafted bone typically requires 4-6 months to mature before the implant can be loaded.
- Sinus lift. Upper jaw implants that require a sinus lift procedure add additional healing time, typically 6-9 months total before the final restoration. Read more about bone grafts and sinus lifts.
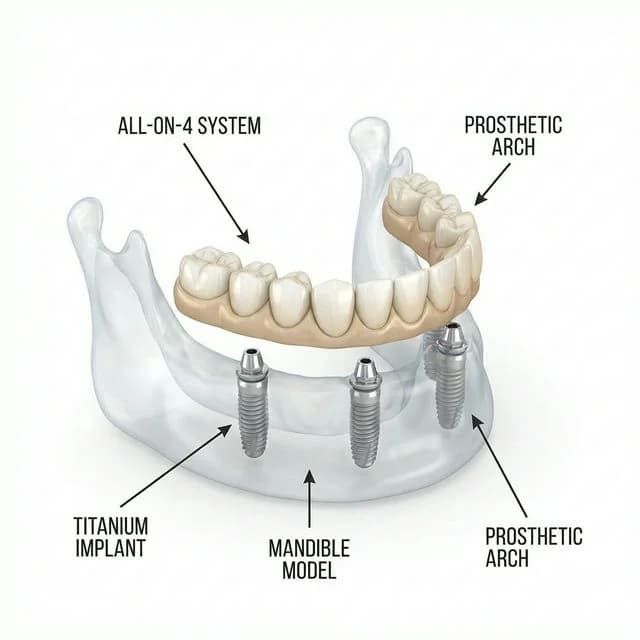
- Multiple implants. Patients receiving multiple implants or full-arch (All-on-4) restorations may experience more swelling and a slightly longer acute recovery phase, though the osseointegration timeline remains similar.
- Medical conditions. Patients with well-controlled diabetes, osteoporosis, or autoimmune conditions may heal more slowly. Dr. Fatima adjusts the treatment timeline accordingly and coordinates with your medical team. Learn more about diabetes and dental care.
- Smoking. Smoking significantly impairs bone healing and is the single greatest modifiable risk factor for implant failure. Patients who smoke are strongly encouraged to quit at least two weeks before and eight weeks after surgery.
Patients from across MetroWest, including Hudson, Framingham, Northborough, Sudbury, and Westborough, consistently tell us that the recovery was easier than they expected. The key is following the post-operative instructions, being patient with the healing process, and communicating with our team if anything feels off.
If you are considering dental implants and want to understand exactly what recovery looks like for your specific situation, Dr. Fatima provides a personalized recovery plan during your consultation. Call Innova Smiles at (508) 481-0110 or book your implant consultation.
Related Articles
- What to Expect During Dental Implant Surgery
- Am I a Candidate for Dental Implants?
- All-on-4 Dental Implants: Full Mouth Restoration Guide
- Dental Implant Materials: Titanium vs. Zirconia
- Why FICOI & FAAIP Credentials Matter for Implants
- Dentures vs. Implant-Supported Options Compared
Related Services
Sources & Further Reading
- Dental Implants: Care and Maintenance — American Dental Association (ADA)
- Dental Implant Procedures — American Academy of Periodontology (AAP)